Last Updated on March 24, 2026
To shred chicken in a stand mixer, simply place the cooked chicken in the stand mixer bowl and use the paddle attachment on low speed for 20-30 seconds until the chicken is shredded to your desired consistency. This method is quick and efficient for shredding large quantities of chicken for various recipes.
Shredding chicken in a stand mixer is a simple and time-saving technique that can be used in a variety of dishes such as tacos, salads, and casseroles. By using this method, you can easily achieve perfectly shredded chicken without the hassle of manually shredding it with forks.
Whether you’re meal prepping for the week or preparing a family dinner, learning how to shred chicken in a stand mixer can significantly streamline your cooking process. This technique can be especially helpful for busy individuals and home cooks looking for efficient ways to prepare their meals.
Cooking And Cooling The Chicken
Cooking and cooling the chicken is a crucial step in preparing shredded chicken in a stand mixer. It ensures that the chicken is tender and easily shreds to perfection.
Boiling The Chicken
To begin, place boneless, skinless chicken breasts in a large pot and add enough water to cover them by an inch. Season the water with salt and any desired herbs or spices, such as garlic powder or bay leaves, to infuse flavor into the chicken as it cooks. Bring the water to a boil over medium-high heat, then reduce the heat to maintain a gentle simmer. Let the chicken simmer for about 15-20 minutes, or until it reaches an internal temperature of 165°F. Use a meat thermometer to ensure doneness.
Let The Chicken Cool
Once the chicken has reached the appropriate temperature, carefully remove it from the pot and place it on a cutting board. Let it sit undisturbed for 5-10 minutes to allow the juices to redistribute, ensuring moist and tender meat. After resting, use two forks to shred the chicken, or transfer it to a stand mixer fitted with a paddle attachment for a quick and efficient shredding process. Alternatively, the chicken can be chilled and shredded later.
Assembling The Stand Mixer
Assembling the stand mixer is the first step in efficiently shredding chicken. Before beginning, make sure your stand mixer is clean and dry. Ensure that all the necessary attachments are available and in good working condition. Let’s delve into the process of preparing the stand mixer and the attachment options for shredding chicken.
Preparing The Stand Mixer
To prepare the stand mixer for shredding chicken, follow these steps:
- Start by attaching the flat beater to the stand mixer. This attachment is ideal for shredding the chicken without pulverizing it.
- Secure the bowl to the stand mixer and ensure it is locked in place to avoid any accidents during operation.
- Plug in the stand mixer and power it on to ensure it is functioning properly before adding the chicken for shredding.
- Take the cooked chicken and allow it to cool slightly before shredding in the stand mixer.
Attachment Options For Shredding
The stand mixer offers various attachment options for shredding chicken, each catering to different preferences and textures:
- The flat beater attachment is suitable for a finer shred and is perfect for recipes where a more delicate texture is desired.
- If you prefer a larger, chunkier shred, the paddle attachment can be used to achieve a more rustic texture.
- For a more hands-off approach, consider using the paddle with the flex edge beater attachment, which provides a more thorough and consistent shred.
Shredding Process
Placing The Chicken In The Mixer
Once the cooked chicken is ready, it’s time to start the shredding process. Begin by placing the chicken pieces into the stand mixer bowl, ensuring not to overload it. If you have a large quantity of chicken, it’s best to work in batches to ensure efficient shredding.
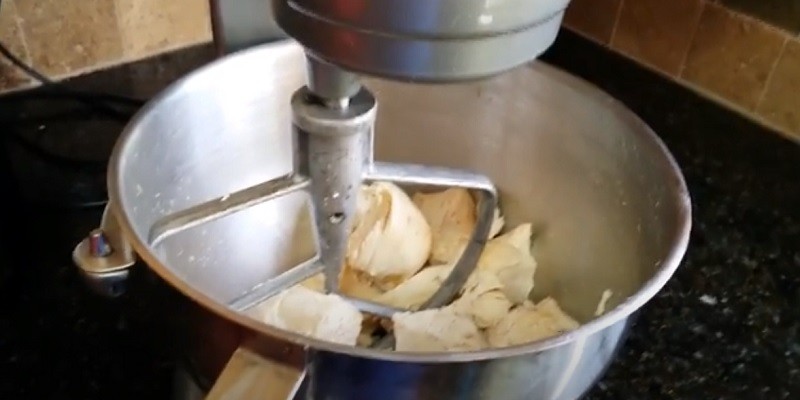
Running The Stand Mixer
Next, securely attach the paddle attachment to the stand mixer. Set the speed to medium and let the mixer do the work for you. Keep a close eye on the chicken as it shreds to ensure you achieve the desired consistency. It’s important to avoid over-mixing, as this can result in an overly shredded texture.
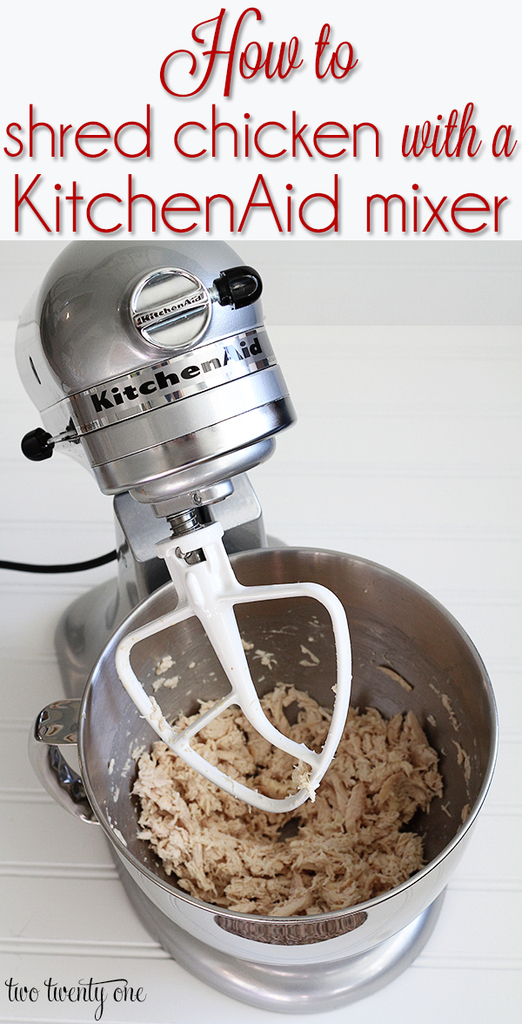
Credit: www.twotwentyone.net
Optimal Shredding Time
Shredding chicken in a stand mixer can be a game-changer in the kitchen, making the process quick and efficient. However, knowing the optimal shredding time is crucial to achieving the perfect texture for your shredded chicken. Whether you’re prepping for tacos, soups, or salads, getting the shredding time just right ensures tender, juicy results that will elevate your dishes.
Ideal Duration For Shredding
When using a stand mixer to shred chicken, the ideal duration for shredding is typically between 20 to 30 seconds. This short timeframe allows the stand mixer to efficiently break down the cooked chicken into small, uniform pieces without turning it into a mushy consistency.
- Set the stand mixer to low speed and keep a close eye on the chicken as it shreds.
- Stop the mixer as soon as the chicken reaches the desired texture. Overmixing can result in overly fine or mushy chicken, altering the intended mouthfeel of your dish.
Over-shredding Precautions
While using a stand mixer for shredding chicken offers an efficient solution, it’s important to be cautious of over-shredding, which can compromise the texture and quality of the meat.
- Avoid leaving the chicken in the stand mixer for an extended period, as this can lead to an over-processed, stringy consistency.
- Always monitor the shredding process closely to prevent the chicken from turning into a paste-like consistency.
- Use short bursts of mixing and check the progress frequently to ensure the chicken reaches the desired texture without being over-shredded.
Utilizing The Shredded Chicken
Storing The Shredded Chicken
When it comes to storing your shredded chicken, it’s essential to keep it fresh and safe to eat. Once shredded, the chicken can be stored in an airtight container in the refrigerator for up to 3-4 days. To extend its shelf life, you can also freeze the shredded chicken for up to 2-3 months. Before freezing, portion the shredded chicken into smaller serving sizes to make it easier to thaw only what you need. Label the containers with the date to ensure you use the oldest shredded chicken first.
Recipes For The Shredded Chicken
Once you have shredded your chicken using a stand mixer, the possibilities for incorporating it into delicious and convenient meals are endless. Here are a few ideas:
- Chicken Tacos: Use the shredded chicken as a filling for tacos, along with your favorite toppings such as lettuce, cheese, salsa, and avocado.
- Chicken Salad: Mix the shredded chicken with mayonnaise, diced celery, and seasoning to create a tasty chicken salad. Serve on a bed of lettuce or between slices of bread for a satisfying lunch.
- BBQ Chicken Sandwiches: Combine the shredded chicken with barbecue sauce and serve it on buns for a quick and flavorful meal.
- Chicken Quesadillas: Layer the shredded chicken between tortillas with cheese and vegetables, then grill until crispy for a simple yet delicious dinner option.
Proper Cleaning Techniques
Proper cleaning techniques for a stand mixer are crucial to maintaining its functionality and ensuring hygiene. In this section, we will discuss the necessary steps for cleaning your stand mixer and its attachments. It is essential to follow these steps to keep your equipment in optimal condition and prevent cross-contamination during food preparation.
Disassembling The Mixer
Before cleaning the stand mixer, it is imperative to disassemble the components properly. Unplug the mixer from the power source to ensure safety before beginning the disassembly process. Start by removing the attachments, such as the mixing bowl, beater, and other accessories. Refer to the user manual for specific instructions on disassembling your particular model.
Cleaning The Attachments
Once the attachments are detached, you can start cleaning each component thoroughly. Use mild dish soap and warm water to wash the attachments. Avoid harsh abrasives or abrasive cleaning pads, as they can damage the surface of the attachments. Use a soft brush or sponge to remove any food residue or stains gently. After washing, rinse the attachments with clean water and dry them thoroughly with a clean cloth.
Appliances Longevity
When it comes to extending the lifespan of your kitchen appliances, including your stand mixer, proper maintenance and storage are key. In this section, we’ll explore how to maintain your stand mixer and provide storage recommendations to ensure its longevity.
Maintaining The Stand Mixer
Proper maintenance is essential for preserving the functionality of your stand mixer. To keep your appliance in top condition, follow these maintenance tips:
- Regularly clean the stand mixer attachments, bowl, and exterior with a damp cloth and mild detergent. Avoid using harsh chemicals that can damage the finish.
- Inspect the power cord for any signs of fraying or damage, and replace it if necessary.
- Check for loose screws or bolts and tighten them as needed to prevent any parts from becoming loose during operation.
- Refer to the manufacturer’s instructions for lubricating any moving parts to prevent excessive wear and tear.
Storage Recommendations For The Mixer
Proper storage is crucial for maintaining the quality and performance of your stand mixer, especially if you intend to keep it in storage for an extended period. Here are some storage recommendations to keep in mind:
- Store the stand mixer in a clean, dry area away from direct sunlight and extreme temperatures.
- If storing the stand mixer for an extended period, consider covering it with a dust cover to prevent dust and debris from accumulating on the appliance.
- When transporting the stand mixer, use the original packaging or a padded carrying case to protect it from bumps and jostling.
Frequently Asked Questions Of How To Shred Chicken In A Stand Mixer?
How Can A Stand Mixer Shred Chicken Quickly?
To shred chicken in a stand mixer, simply place the cooked chicken in the mixer bowl, use the paddle attachment, and mix on low speed until shredded to your desired consistency.
What Type Of Stand Mixer Is Best For Shredding Chicken?
Most stand mixers with a paddle attachment can be used to shred chicken. However, a stand mixer with variable speed settings and a strong motor is ideal for efficient shredding.
Is It Safe To Shred Hot Chicken In A Stand Mixer?
Yes, you can shred hot chicken in a stand mixer. Allow the chicken to cool slightly for easier handling, and use caution when transferring hot ingredients to the mixer bowl.
Can I Shred Bone-in Chicken Using A Stand Mixer?
While it’s possible to shred bone-in chicken using a stand mixer, it’s best to remove the bones and excess skin before shredding for a smoother and more consistent result.
What Dishes Can I Make Using Shredded Chicken?
Shredded chicken is versatile and can be used in various dishes such as tacos, sandwiches, salads, soups, and casseroles, adding protein and flavor to your favorite recipes.
How Long Can Shredded Chicken Be Stored In The Refrigerator?
Shredded chicken can be stored in an airtight container in the refrigerator for up to 3-4 days. Be sure to label the container with the date of preparation for reference.
Conclusion
Mastering the art of shredding chicken in a stand mixer can revolutionize your cooking. It’s an efficient and time-saving method that yields perfectly shredded chicken every time. By following the tips and techniques shared in this guide, you can effortlessly incorporate shredded chicken into your favorite recipes.
Elevate your cooking skills and bring a new level of ease and versatility to your kitchen with this simple yet effective method.